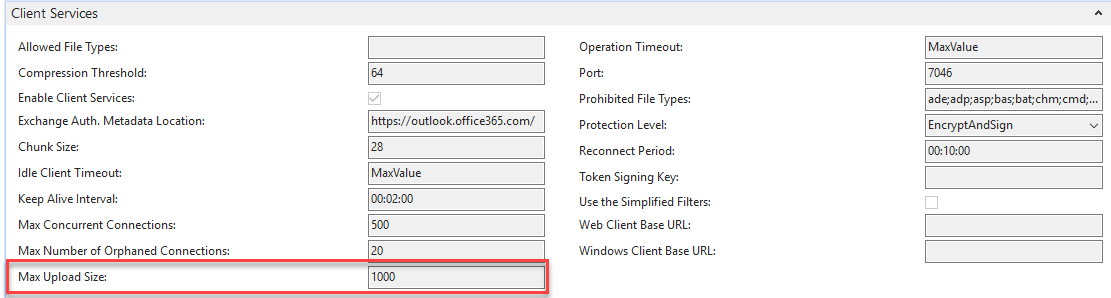
If you are uploading bigger files, you may need to adjust Maximum Stream Read Size (bytes) and Max Upload Size (MB) parameters on the service tier that is used by users to upload documents.
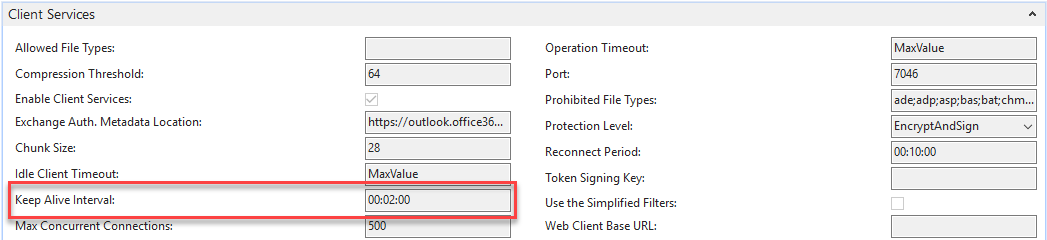
For slow connections and big files please adjust Keep Alive Interval parameter too, the default 2 minutes might not be enough to upload a big file to server.
And last but not least, you can try to use a different function to upload files by checking Use Big File Uploads in NavSherpa Setup.
For newer NAV versions it is recommended to set the Security Protocol parameter to Tls12. However, if this parameter is missing, you can override it in NavSherpa Site Setup settings.
How to set up synchronization job on Application Server
Start "Dynamics NAV Administration".
Select the NAV server instance connected to the database with NavSherpa.
Activate edit mode in NAV server instance configuration by selecting the "Edit" button.
Set the "Startup Codeunit" to "4065010".
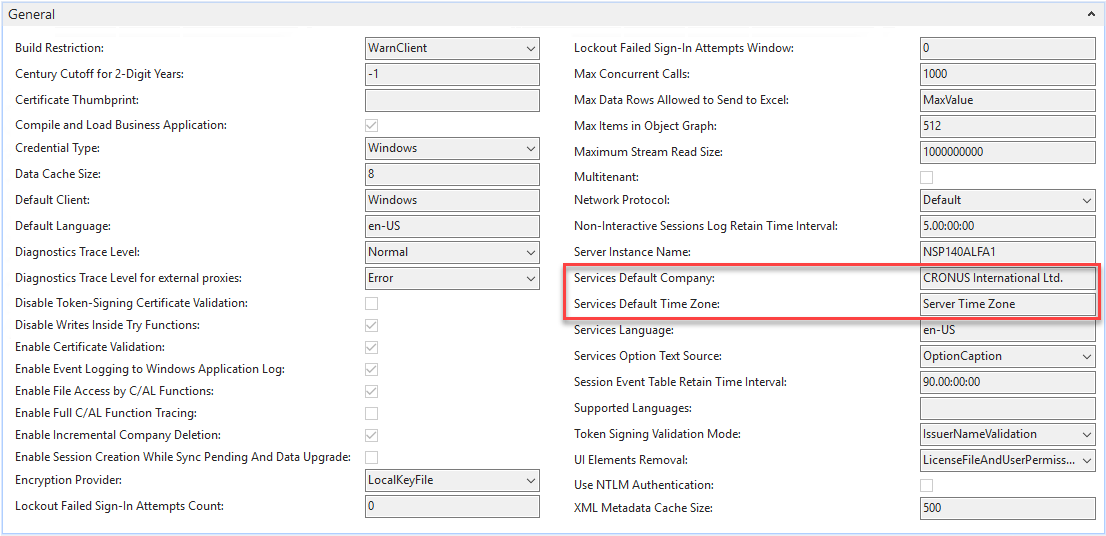
Set the "Services Default Company" to the NAV company, where you would like to run NavSherpa. (Optional) If you want to run NavSherpa in multiple companies, create an instance of the service for each company. We recommend to disable all services that you don't need on this instance – like client, OData, SOAP etc. (Optional) It is recommended to set the "Services Default Time Zone" to "Server Time Zone", to prevent issues with timestamps and NavSherpa synchronization.
Save the changes.
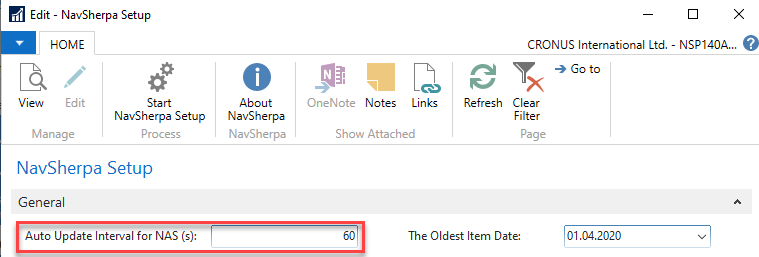
Set the job interval in NavSherpa Setup (in seconds). For test environment you can run the job every minute, for production environment we recommend to set the limit higher, e.g. 5 minutes, because with every run NavSherpa is making some calls on SharePoint.
Restart the NAV server instance.
Set up an administrator notification:
Run the "Role Tailored Client".
Open the page /Departments/Administration/Application Setup/NavSherpa/NavSherpa Users.
Set or select the user as an administrator and enable "Notify Errors From NAS". This will generate notifications to the "My Notification" section in the administrator's home page.