How to archive or migrate documents
If you want to move large quantities of documents from one library to another, you can use new NavSherpa feature called SharePoint Archiving. This feature is available from versions 25.0.0.2, 26.0.0.1 or 27.0.0.1 and you can use it for following purposes:
-
Archiving old documents from a production library to archive library, while still maintaining NavSherpa
Smart Tree links. This can be useful especially in
SharePoint Online if some of the library operations start slowing down due to the large number of documents.
-
Migrating documents from
SharePoint on-premise to
SharePoint Online.
Prepare SharePoint List Setups
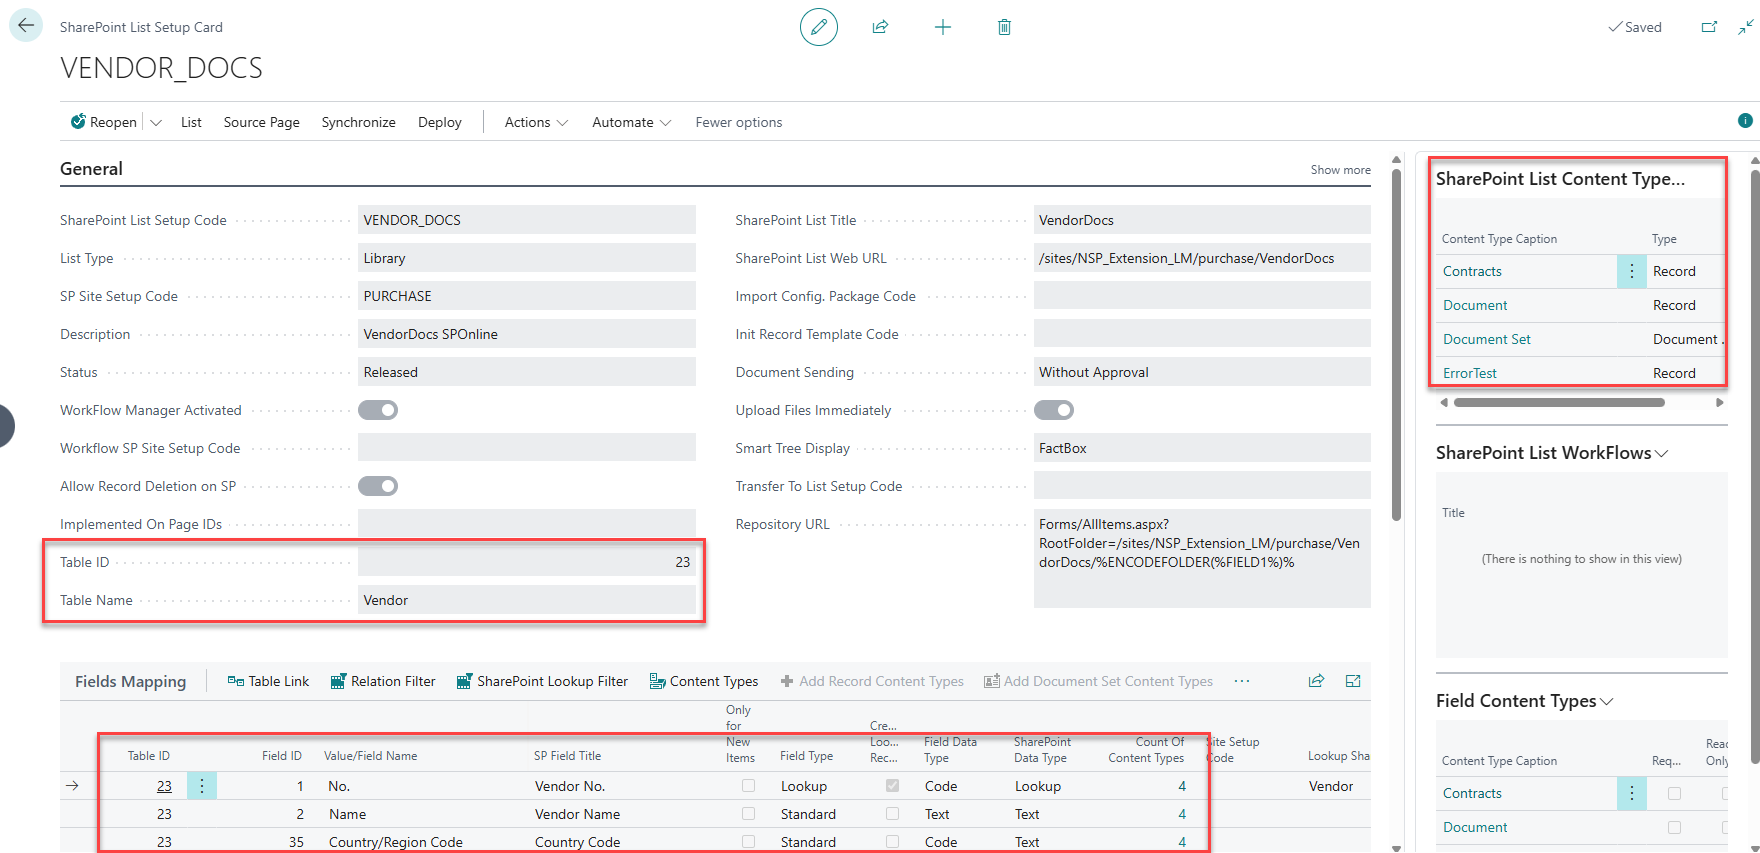
First step means locating SharePoint List Setup of the original library that will be used as a document source. The archiving function can migrate only files that were uploaded with NavSherpa and have correct document mappings (i.e. show in the Smart Tree). In this example, we will use a library attached to the Vendor table, with some content types and metadata. The library is located on SharePoint Online, but you can use any library setup for this purpose.
Now you need to create the List Setup of the library that will be used as the archive or migration destination. The library can be on the same website or on a completely different SharePoint web. If no such library exists, you can create the new setup by using Actions / Copy / Copy Setup From function and then change the library name or deploy it to a different web. Below you can see an example of such archive library:
-
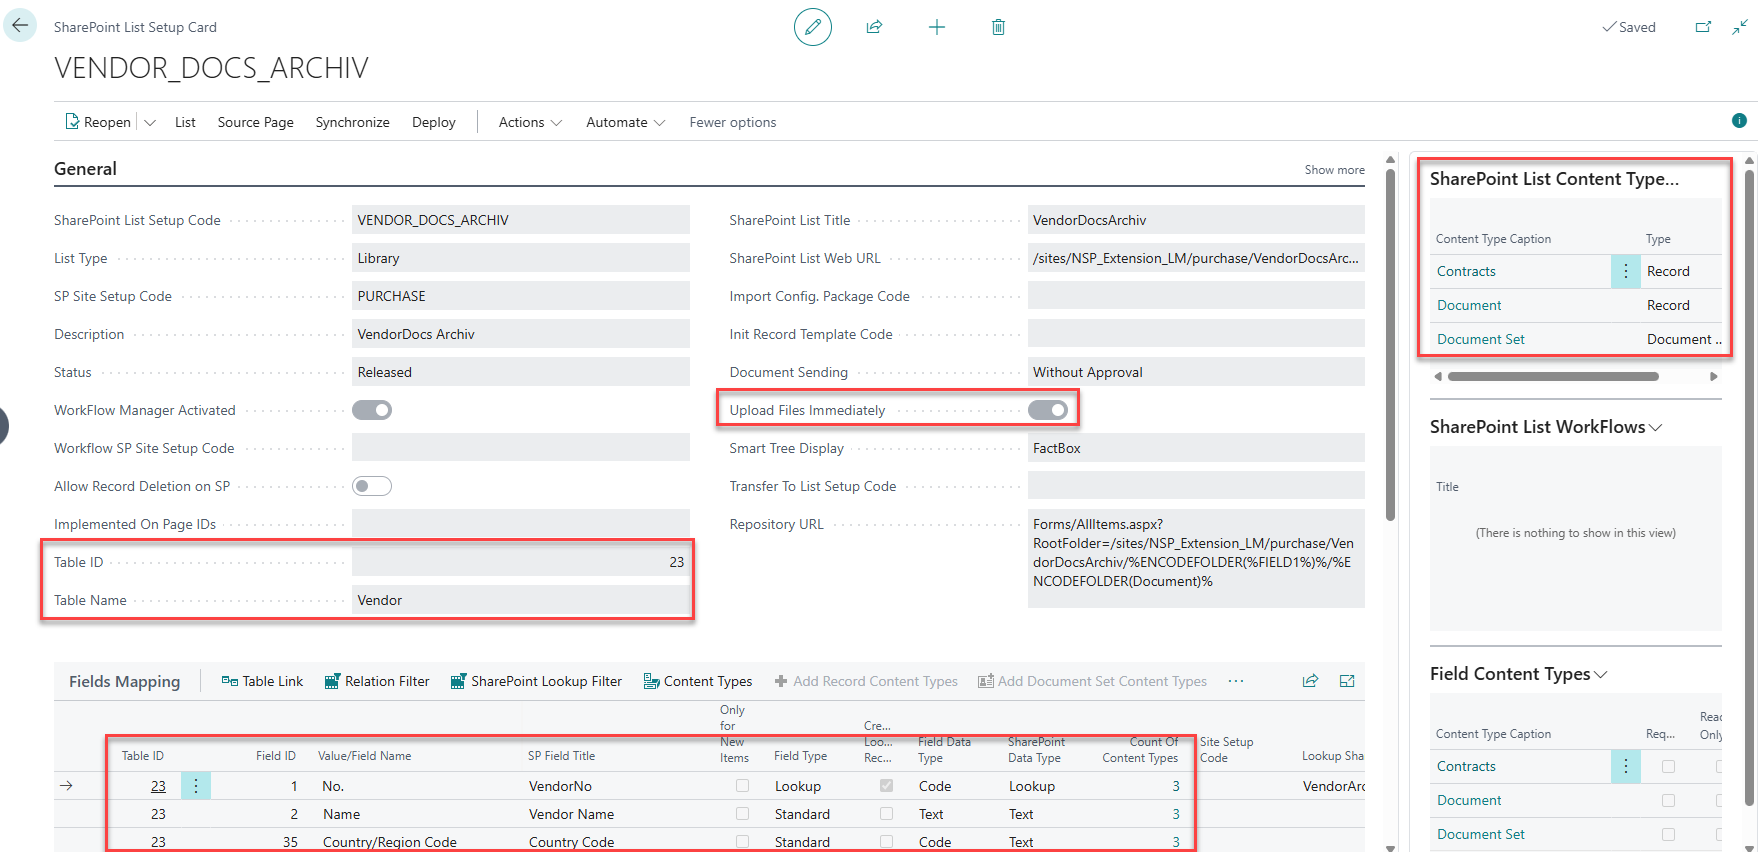
The
Table ID must be the same in both origin and archive setup.
-
It is recommended to have the same content types in both libraries, because the archiving process will always copy the document to the content type with the same name.
-
You must check
Upload Files Immediately, because the archiving process will immediately check, if the file was properly uploaded.
-
The metadata are up to you. You can use the same in both libraries or make them completely different. NavSherpa does not copy any values from the original web, the metadata are filled from
Business Central data during document upload.
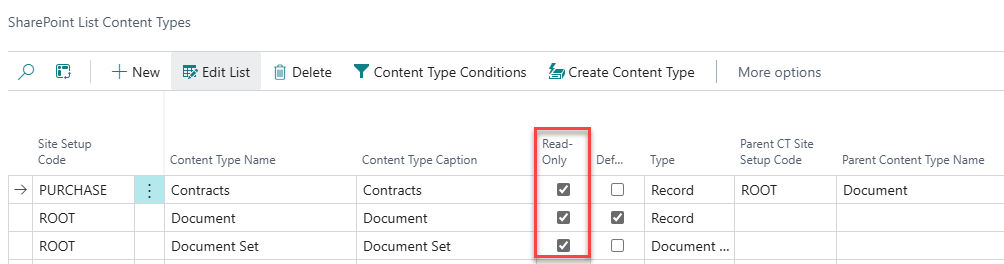
You can use Read-Only checkbox in content type settings to limit user access in Smart Tree. For example during migration from SharePoint on-premise, your users should add new documents to the target SharePoint Online library only – and you can limit the access to the old on-premise one this way.
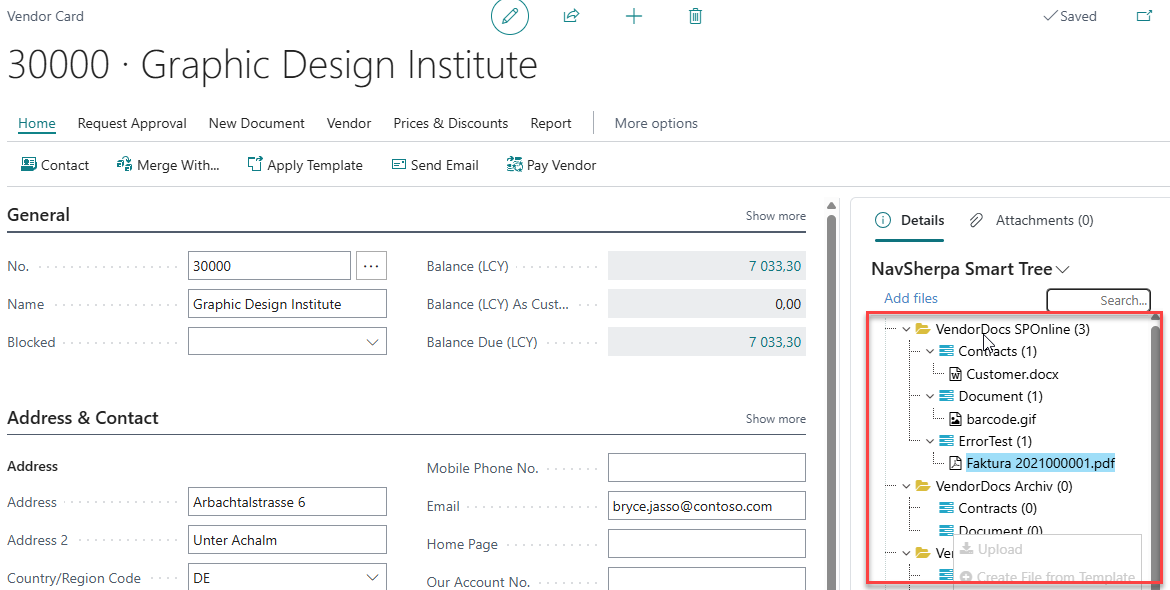
The Smart Tree on the Vendor Card will now look like this:
Users will see both libraries in the Smart Tree. But in this example we made the archive library read-only, so they can add new documents to the origin library only.
Create Archiving Setup
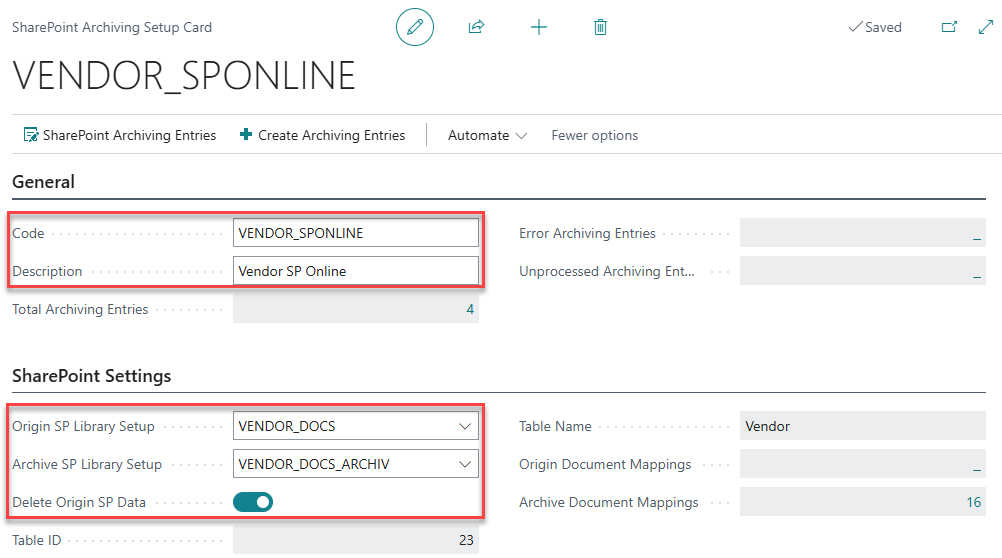
Next step is creating new SharePoint Archiving Setup.
-
The
Code and
Description fields are used to describe the setup purpose.
-
In the
Origins SP Library Setup and
Archive SP Library Setup select the
SharePoint list setups of the origin and target library.
-
Check
Delete Origin SP Data if you want to delete the documents and folders on
SharePoint after successful migration.
In the Fields and Filters tab select fields from the table that will be used as a main record reference (Document No. Field ID) or for record filtering when creating archiving entries (Filter1 Field ID and Filter2 Field ID).
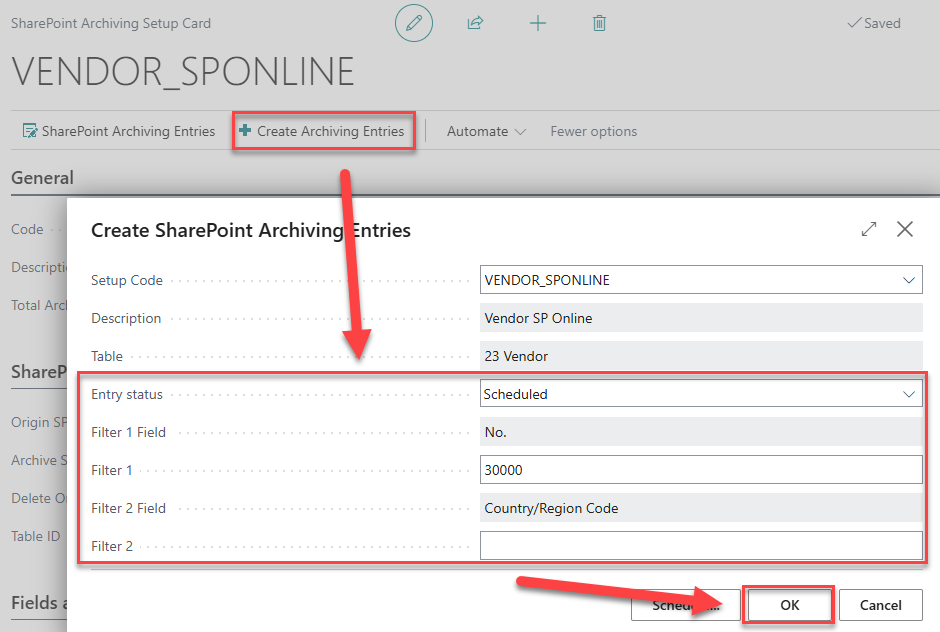
Create Archiving Entries
Now you can create new SharePoint Archiving Entries – select Create Archiving Entries action in the archiving setup or card.
-
Set the new
Entry status:
-
Scheduled (Default) – the entry will be scheduled to run with the next automatic batch. If the migration is successful, it will delete original document mappings and
SharePoint documents/folders (if selected in the archiving setup).
-
Test – the entry will be scheduled to run with the next automatic batch. But it runs in test mode only, meaning that it will try to copy the documents but it does not delete origin mappings or files.
-
New – the entry will be created but will not automatically run. You can use it for example to create archiving entries, have them checked and then switch them to the
Scheduled status.
-
In the filter fields you can limit the archiving entries creation to some records only (e.g. filter by vendor no., country code, posting date etc.).
New entries will be created only for the records that have some documents attached in the origin library. In our example, if there are no documents on the Vendor Card 30000, the entry will not be created.
You can view newly created entries in the Unprocessed Archiving Entries field on the archiving setup.
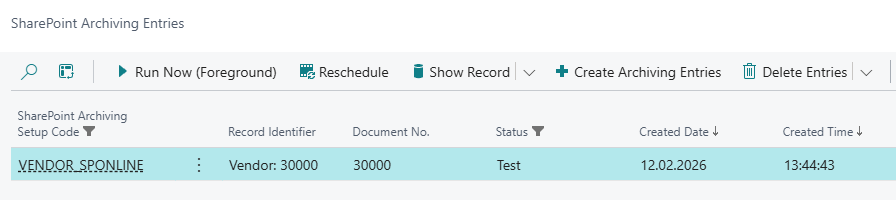
In this example, we created the first entry with Test status, so the process will not delete origin documents or mappings. When you create new archiving setup, it is recommended to try it at least once before switching to regular scheduled entries.
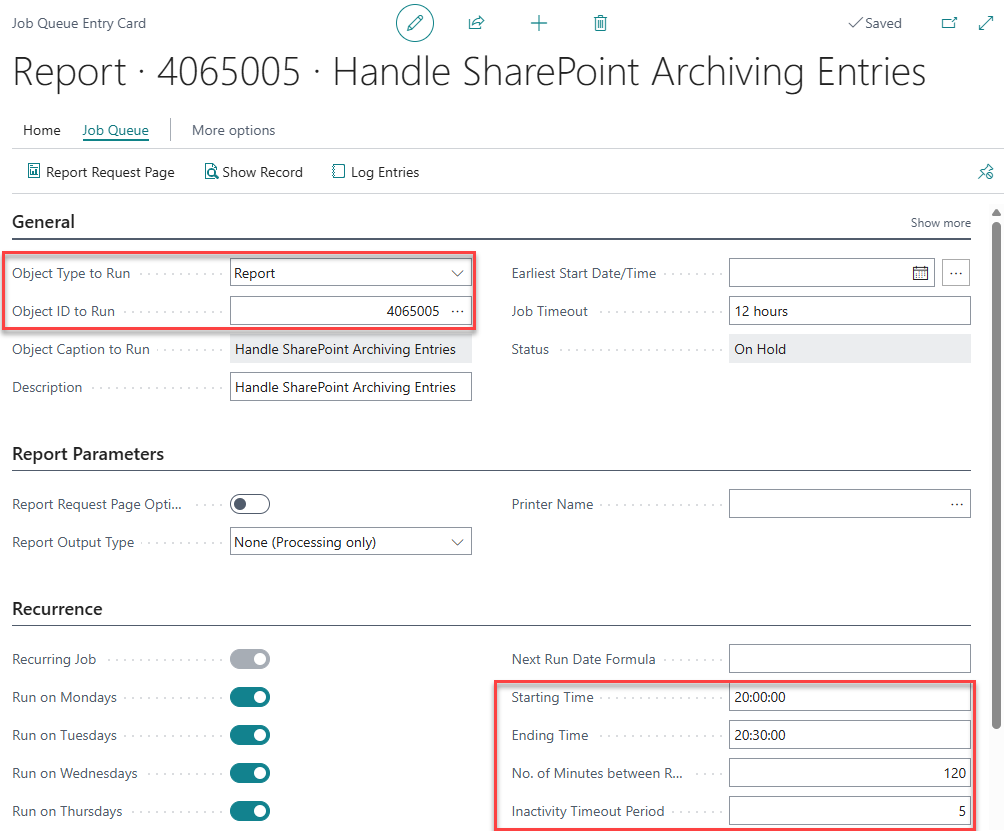
Process Archiving Entries
For testing purposes you can process selected entries manually with Run Now (Foreground) function. For batch processing you need a job queue entry for Report 4065005 Handle SharePoint Archiving Entries.
-
It is recommended to run the job during non-office hours to reduce the risk of reaching
SharePoint API limits.
-
The job will process all archiving entries with
Test or
Scheduled status. If the job timeout is reached, the rest of the entries will be left unprocessed for the next batch run.
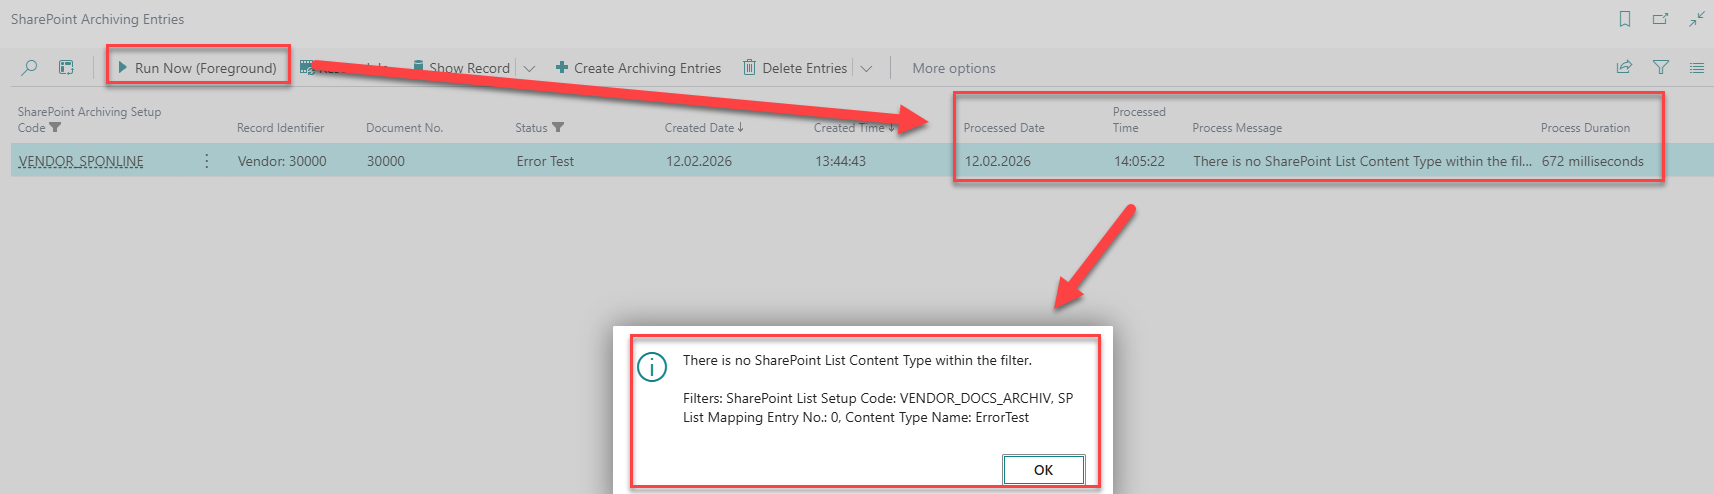
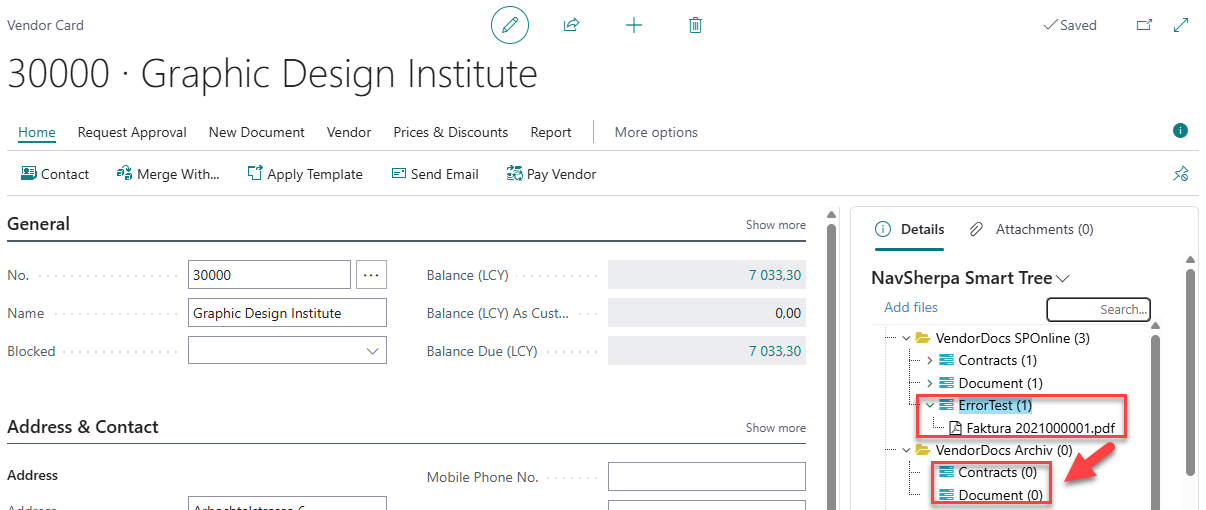
In our example the entry will end in error, because there is no ErrorTest content type in the archive library and we have a document there. This can be easily fixed either by deleting the document or adding the content type to the archive library setup.
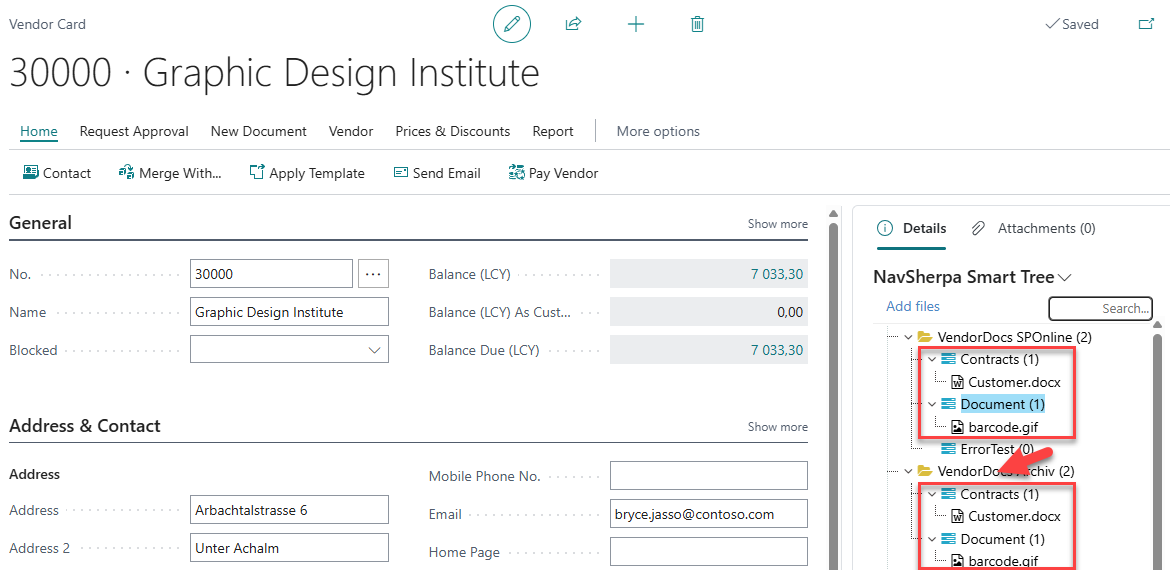
After the fix, the second run was successful and the entry was marked as Processed.
Now if you check the Vendor Card you will see the migrated documents in the archive library. Since the entry was ran in Test mode, the old mappings and files are still there.
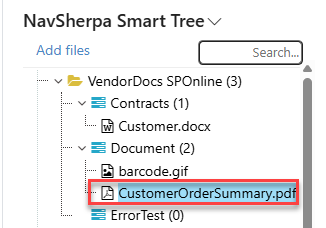
Now let's add a new document to the origin library and create and run new archiving entry with Scheduled status.
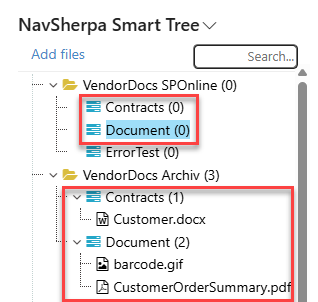
As you can see, this entry copies only one file - already existing files were skipped. In the Scheduled mode, the process now deleted original document mappings and in our case even the files and folders on SharePoint (this depends on the archiving setup settings).
Check Data
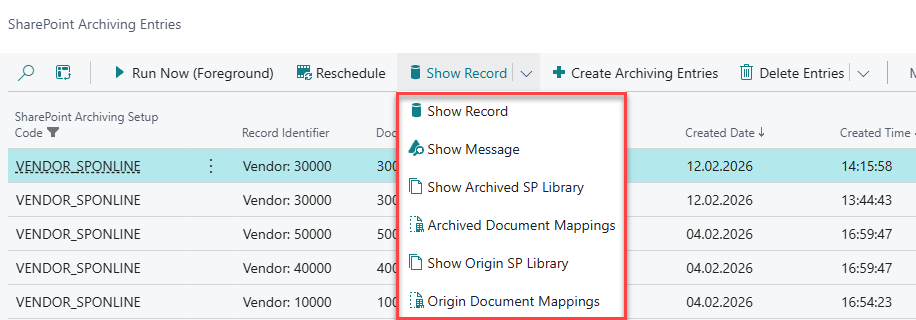
To check the migration results you can use a number of functions on the archiving entry.
-
Show Record – show the related record or card (
Vendor Card in our example).
-
Show Message – show full error message.
-
Show Origin/Archived SP library – show the related folder on origin/archive
SharePoint web.
-
Origin/Archived Document Mappings – show origin/archived NavSherpa document mappings related to this record.
You can use another set of functions to delete unwanted archiving entries or even delete original or archived data on SharePoint (use with caution).
Feature Limits
The archiving feature has some built-in limits:
-
Archiving process does not transfer old metadata from the origin library. It just fills-in metadata columns based on the
Business Central record and archive library setup.
-
The feature does not allow you to transfer
SharePoint list items. However, if your library uses lookup fields, new list item can be created automatically during file upload.
-
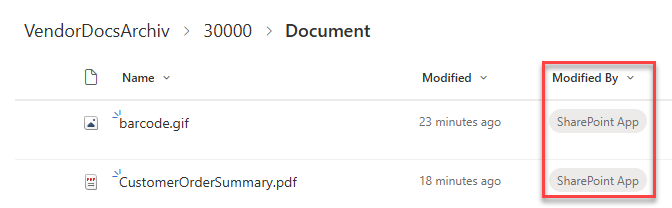
The process does not transfer values of
Author and
Editor fields. With
OAuth2 authentication, these fields are always filled with
SharePoint App value.